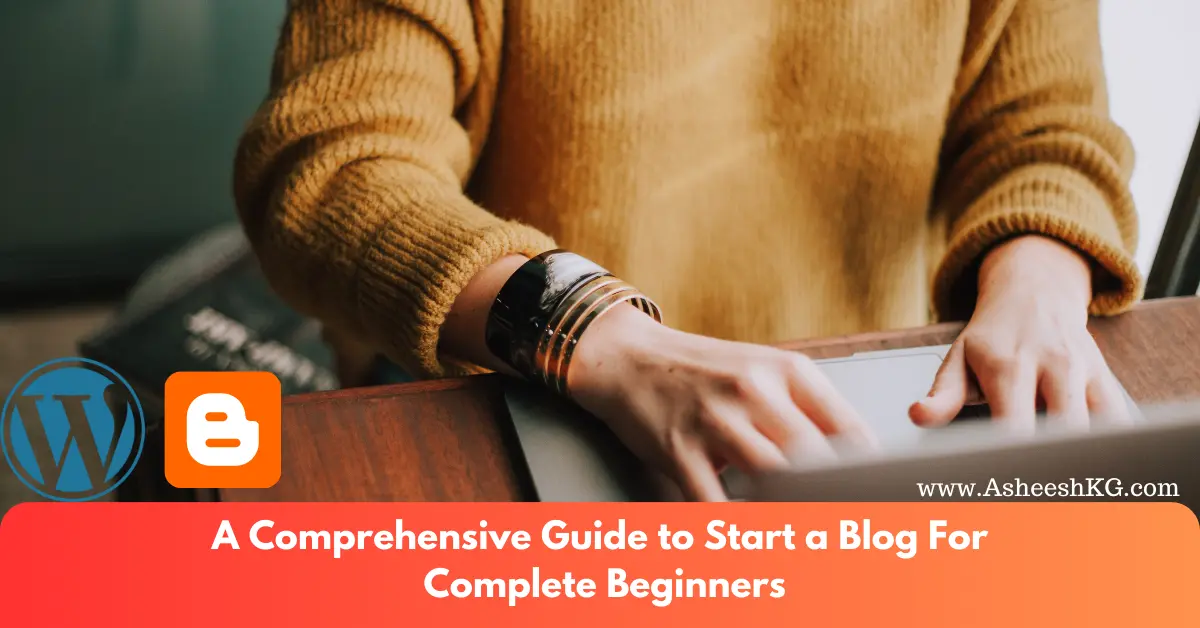
A Comprehensive Guide to Start a Blog for Complete Beginners
 •
Blogging
•
21 min read
•
Blogging
•
21 min read
Summary: Learn how to start a successful blog from scratch. A comprehensive step-by-step beginner's guide covering niches, hosting, and monetization.
Do you want to start a blog and search for a crystal clear step-by-step guide?
Table of Contents
- 1. These 10 steps will help you to create a successful blog.
- 2. How to Start a Blog in These 10 Simple Steps
- • 1. Choose a Blog Niche
- • 2. Choose a Domain name
- • 3. Buy a Web Hosting & Register Domain Name
- • 4. Setup WordPress
- • 5. Theme, Branding, & Design
- • 6. Install Essential Plugins
- • 7. Write your first blog post
- • 8. Must have these pages In Your Website
- • 9. Promote to Drive Free Traffic
- • 10. Monetize your Blog
- • It’s Time to Wrap up
Maybe you have seen some youtube videos, or read some income reports or some people who quit their 9 to 5 job and earn from home and make a complete living from it. You also want to be like them. Or maybe you want to share your thoughts and knowledge with the world or write about your passion.
Whatever the reason you have to create a blog, it is the best decision you have ever made. But for beginners, it is an overwhelming process because of the cluttered information about blogging over the internet.
After reading lots of blogs about how to start a blog, I observed that almost every blogger has written about it on their website. And they have written very well. But as a beginner, only choosing a domain, buying hosting, and setting up WordPress is not enough. You have to learn about website structure, crafting a piece of content, driving organic traffic, and at last monetization.
But, don’t worry, I have got you covered here. This in-depth guide will teach you about every single aspect of blogging such as choosing a perfect niche, Buying the best hosting provider, setting up WordPress, designing your website, driving free traffic, monetization, and much more.
This guide will include a step-by-step process with screenshots so that a non-techy can also create a website.
So let’s deep dive without any delay.
These 10 steps will help you to create a successful blog.
- Choose a Blog Niche
- Choose a Domain name
- Buy a Hosting provider
- Setup WordPress
- Theme, Branding, & Design
- Install Essential Plugins
- Write your first blog
- Promote to Drive Free Traffic
- Monetize your Blog
How to Start a Blog in These 10 Simple Steps
1. Choose a Blog Niche
Choosing a blog topic is not a tedious task. But, as a beginner, it can make you overwhelmed.
If you have any passion, hobby, or skill then you can write about that easily, but if not, then how can you choose a blog niche?
Let me help you with three simple aspects of a Niche.
- Fun:- A blog topic should be enjoyable. You must enjoy and be focused on your topic for the long run.
Because I have seen so many bloggers who are interested in the topic today and after one month they lose interest and then their posting frequency goes down and in the end, they quit.
- Audience:- There should be enough audience for your niche. Because there is no use if no one is there to read your epic content. In the end, you also want to take a monetary benefit of your blog and it depends on the traffic only. The audience is just like oxygen in the air.
- Monetization:- Everyone wants to make money with their blog. So you should consider the different channels of monetization. Your topic should be monetizable in several ways. Don’t just rely on one channel.
Writing a blog is very easy, only you should have some extra knowledge than your audience. But choosing a Niche and finding a relevant audience is a bit difficult for a beginner.
Don’t worry, you can read this blog post for finding a Perfect Blog Niche as a beginner. In this post, I have described all possible ways to find a topic.
You can make money with almost every niche but here is a list of some profitable Niche:-
- Make money Blogging
- Health & Fitness
- Food & recipes
- Travel
- Finance
- DIY
- Relationship Advice
- Lifestyle
- Beauty & Fashion
- Parenting
If you are interested in any topic listed above then just start your blog and create the epic content. You can combine more than two topics in starting and narrow down in subtopics with time.
I hope you have selected a perfect topic, so now let’s create your blog name.
2. Choose a Domain name
There are so many practices for choosing a domain name but I think it doesn’t really matter. Basically, the common practice for selecting a Blog name is to include the topic name or the purpose of the blog. But, there are so many successful bloggers who use their name and made it an authority blog such as Neil Patel, Jeff Bullas, and so on.
But on the other hand, selecting a funny or weird name also help you to grab the attention of the audience and help to win the competition against the competitors. Such as Amazon, Apple, Google, IBM, and so on.
There are some guidelines that will help you to select a perfect Blog name:-
- Choose a relevant name that can reflect the main purpose of your blog.
- Make it short if possible because short names are easy to memorize.
- Avoid using Numbers and Hyphen because it is difficult to memorize
- Try to select a .com domain because it is super easy to remember a .com domain and people automatically think about.com
If you have no idea about choosing a blog name then you can use an online domain name generator. You will have to just put your keyword or your name and it will suggest lots of unique blog names.
List of Some free online Blog name generators:-
- Domain Wheel
- Domainr
- Bust a Name
- Panabee
- PickyDomains
- Domainhole
- NameMesh
- LeanDomainSearch
- Name Station
After, choosing a perfect Domain name, it’s time to start the process of registering your Blog name.
3. Buy a Web Hosting & Register Domain Name
Before getting your hands dirty in buying hosting let me tell you some important facts about the Blogging platform and Web Hosting.
There are so many free blogging platforms like Blogger, Wix, medium, Tumblr, Weebly, and others. But they only provide you limited features and someday you realize that I can turn my blogging hobby into a business then you have to hire a professional to move your entire blog to WordPress. And it will cost around $2000. As a beginner, it will be difficult to arrange this much money.
I only recommend you choose the WordPress platform and shared hosting. Because it is easy to use and leveraged with lots of features. If any new features you want to add someday, you can do it only by installing simple plugins, no need to worry about the coding and other messy stuff.
Maybe there are one question pop-ups in your head, what is Web hosting?
Web hosting is a server space to put your entire website files. Do you know your website contains a bunch of files like HTML files, CSS files, Php files, and more? When people search a query for your website on the internet, they just access your all files through a server. I know because I am a Computer Science Engineer.
There are three types of hosting available for a blogger:-
- Shared Hosting:- This is a shareable server space where you share server space with other websites.
- VPS Hosting:- Here a particular portion of the server is reserved for you.
- Dedicated Hosting:- This server is only for you. There is no other website to share a space with you. It’s all yours.
But as a beginner, to start a blog, I only recommend you to buy shared hosting that is enough. At the time of renewal, you can upgrade your hosting easily.
If you are thinking that “How to buy this hosting and which one is best?”
Don’t worry I am with you to guide in each and every step here.
Don’t think about which one is good or bad. I recommend you buy a Bluehost hosting provider.
Bluehost is the best hosting provider with 24/7 customer support. Even all veteran bloggers recommend Bluehost for beginners.
Bluehost is one of the largest hosting providers which is more secure and reliable.
Benefits of buying Bluehost:-
- Free Domain Name for one year
- Free SSL Certificate
- Pre-installed WordPress, No need to install like another hosting provider
- 24/7 Expert Support on Chat and Call
- 30 days Money Back Guarantee
Enough talking, Now let’s buy your web hosting provider. Excited, right?
Click on this link to access the Bluehost page. Bluehost really helped me so much in my starting days, every day I ask them to help me and they help unless my problem is not solved. I really trust this hosting provider.
- If you have made up your mind to start a blog with Bluehost then just click on the Get Started button. Web hosting and a FREE DOMAIN NAME will be yours for just $3.95. But if offers will be available at the time of purchasing then you can get it for just $2.65.
- I recommend you choose Basic Plan because it has all the features which you want for your first blog and it is cheap for you. Don’t as per your requirement you can upgrade at any time.
- Now Enter your selected Domain name in the “Create a new Domain” Box.
- If you have not decided on any domain name yet then just leave the above box and wait for 2 minutes, a pop-up will appear on your screen. Just click on the green “Choose Free Domain Later” button. You will receive an $11.99 value credit for a free Domain.
- When you enter your domain name and it will show available on the next page, here also you wait for 1 minute, one pop-up will appear again where they will provide you to claim your savings. This means they will give you some OFF on first-time purchasing. It’s the best deal to start a blog now only. Just Click on Claim Saving.
- Now Enter your Address detail here.
- Scroll down, Now you have to choose Hosting “Package Information”. I will recommend you buy it for 36 months because it will only cost $3.95/month. Buying an Advance hosting package is safer because if you forget the renewal date then your site can be removed from web hosting.
- Scroll Down, Now you have to choose some extra features for your package. Bluehost automatically ticks on all the options but you only need a “Domain Privacy Protection”. So untick all options Except Domain Privacy(the top one).
This DPP protects your all information such as Email, Mobile no. Address Details that you use to register your Domain. - Now Enter Your Payment Information Here.
- In this step, tick the below-given box and submit.
Finally, you have created a Bluehost User account. It’s time to grab your coffee, take a sip and then create a Password for your brand-new account. Create a strong password and keep it safe or remember it. I suggest you keep a personal diary and write your password in it. Your password is the main key to access your site.
You can create your own password or Bluehost also suggests the strongest password. It’s better to use the suggested password and write it in your diary. I know it is old fashioned to write an important thing in dairy but believe me it is the safest idea ever.
Now it will take some time to load your site as shown below, till then wait. It’s time to click on the Login button.
Just enter your password and click on the Login button.
At this stage, Bluehost will tell you to give a website name and Tagline and also choose a WordPress theme. But, I suggest you skip these steps because I will show you step by step process further to set these things up in WordPress Setup.
Now Bluehost will install WordPress automatically.
Congratulations! Now you can start building your blog. Click on the Start Building button.
On the next page, Bluehost Portal will open. Just click on Log into WordPress button and it will take you to WordPress Dashboard.
Bluehost blog login Portal
Finally, you have entered on WordPress Dashboard. The actual game of blogging begins from here my friend.
Now without any delay let’s set up your WordPress dashboard and configure it properly.
4. Setup WordPress
WordPress setup is the most important part of your website. We called it backend in technical language. You can control everything from here and organize your website for a better user experience.
Most of the how-to-start Blog tutorial only shows you the basic setup and leaves you in the middle. I had never found any tutorial which shows you each and every step in detail. I face lots of problems starting although I had a technical background. That’s why I decided to write a detailed guide in which each and every WordPress setup will be explained. Stay with me!
Now I am going to explain each and every term which is available in the left-hand sidebar on the Dashboard.
- Posts:- It is the place where you can write a new post, or see the collection of all your posts. You can add categories and tags to your posts and manage them from here.
- Media:- Here you can store all images and Videos. For uploading a new image or video, you only have to click Add New option. In the Library option, you can see all your stored images.
- Pages:- In this option, you can create a page for your website. Just click on the Add new option to create a new page such as About, Privacy Policy, Disclaimer, etc.
- Comments:- Here you can manage your all comments for each blog post. You can disapprove of any spam comments.
- Appearance:- This is the place where you can upload and install the theme and change the entire look of your Blog. You can see there are a few other options like Theme, Customize, widgets, and more. Just wait for a minute, I will discuss the next point in detail.
- Plugins:- This is the essential place where you can install plugins and edit them as per your requirement. These are small pieces of software that add some codes to your PHP file. Don’t install too many plugins otherwise, it will slow down your website. You can install the plugin by just clicking on the Add New option. I recommend you one plugin to install this moment when you start your blog, Free Yoast SEO Plugin. It is the most important plugin for your blog which helps in SEO. It means Google can easily find your blog. To know more about Important Plugins which can Improve your SEO from day 1, just read my article.
- Users:- Here you can set your Profile name, email, Social Media URL, and Gravatar ( a small pic of yours).
- Setting:- This is the main part of your WordPress where you can do important settings for writing, reading, Permalinks, Privacy, and more. It helps to make your website SEO friendly. You can see a few options here but I am going to discuss only the important one.
- General:- In the general option, you can set the site title, Tagline, Site URL, set membership for other users, language, and time.
- Permalinks:- This is an important setting that affects your SEO visibility. So before publishing any post just configure it as shown below in the image. Always keep your blog post URL short. I always keep my permalink on the post-name option and it is recommended for SEO purposes.
Finally, I have covered all the important options in the WordPress Dashboard. Now you are all set to visit your site.
To visit your site, just click on the small home button on the left-side upper corner as shown in the image.
Visit your Blog Website
So finally you have landed on your website for the first time. You feel happy, right? But, look at your blog once, it looks so ugly right but doesn’t worry we are going to learn about making it pretty for our users in the next step.
5. Theme, Branding, & Design
Now it’s time to change your website look and do some branding stuff. After all, we are entering an online business and for every business, branding is important that’s why visitors will trust us.
In the above section, I have discussed a bit about the appearance option, here I will elaborate it in detail.
Appearance:- You can change your website look from here by uploading a new theme. Under the appearance section you can see a few other options, let’s discuss them one by one.
Theme:- Here you can install a theme or you can also upload your own theme if you have one. There are thousands of free themes available here, you can simply type names in the search plugin button and install it and activate it. After installing a new theme it will change the entire look of your website. But it still looks clattered. So now you have to customize it.
Customize:- Click on the customize option, and it will take you to the customization page. Where you can edit each section of your website such as site identity, header, front page, sidebars, blog feeds, posts, pages, color, background image, and much more.
Widgets:- This widgets section allow you to put important widgets in your sidebars like categories, recent posts, popular posts, archives, calendar, and much more option. These widgets navigate users easily to an important page or blog.
Menus:- Menus allow you to set the navigation for users on your important page of websites. You can keep your all pages in header menus or footer and manage their location from here.
That’s enough about customization and look. Now let’s talk about some branding stuff.
Branding material basically contains:-
Your website Color:- Your website should have a particular color like text hover color, background color, etc. For example:- have you seen companies like Facebook, Twitter, KFC, Pinterest, and Instagram, that have their own particular color?
A logo on the Header section:- You must have a beautiful logo on the header section if you don’t know how to make then you can simply head over to Canva and get some ideas about the professional logo and make your own logo there.
A site favicon/icon:- A site favicon is the little image that you can see on top of the browser page with the name of the website
Images in your blog posts:- Always use relevant images within your blog post to make it engaging.
But how can you upload your logo and favicon?
In Customize option, there is an option called site identity. Just click on that and upload your logo and favicon
Now your Branding part is over. Let’s jump on to the Plugins section before publishing your first blog post.
6. Install Essential Plugins
Plugins are the most important thing for a WordPress website. It adds functionality to your website. Plugins are just a bit of code or small software when you install it a bit of code is automatically added to your PHP file and starts functioning.
Too many plugins can slow down your website speed so please just install what you really need. I have mentioned 10 essential plugins for WordPress here just read it and install all the plugins which I listed.
Let’s try to install some plugins:-
- Head over Plugins —> Add New
- You can simply search all free plugins in Search Plugin Box and Install and activate it
- For Premium Plugin, You have to Upload a ZIP file. Just click on Upload Plugin and add your Zip file and save and then activate it.
Always Activate plugins after installing them and use them as per the given plugin’s instructions.
7. Write your first blog post
Now it’s time to finally start writing your first blog post. You feel excited, right? Ok, let’s see the process of writing the post.
- Head over to Posts > Add New
- Add Title first, below that write your post.
- After finishing writing, select your category or add a new category
- You can add tags here to make it searchable and easily
- Add a Featured Image
- Now Hit Publish to make it available on your website.
Writing content depends on your hard and smart work because writing is an art that develops along with time and practice.
You can find several blogs about writing tips but you can only get ideas and learn the tricks and tweaks about writing a good blog. But how you are crafting words in a blog, all depends on your practice.
I suggest you before buying a domain, first practice for writing at least one month. You can use free blogging platforms such as Blogger, WordPress.com, Medium, Wix, and more to start and learn all the nuts and bolts of writing a good blog post.
8. Must have these pages In Your Website
It is recommended that every blogger who just starts a new blog should have some essential page. You can create it just like a post but there is no publish date. These pages should always be in your navigation menus.
Must have these Blog pages in every blog:-
About:- This page tells visitors about your blog content and a little bit about you. It is necessary that your blog shows a man behind it. So people can trust on your website.
Contact:- So many users or readers will wish to contact you for doing business with you or ask a solution for any problem. That’s why the contact page is mandatory.
Privacy Policy:- This page will describe your privacy-related stuff. People can trust on your website because they feel safe to browse your site.
You can create pages just like the post:-
- Click on the Page > Add New
- In the Title Write the Page name
- Now write content related to your page title
- Hit Publish.
Now you have finished all your work. You have also written some posts on your brand-new website. Now it’s time to tell the world that you have something valuable for them. It means you have to drive traffic on your blog post.
9. Promote to Drive Free Traffic
Now you have started to write content and want that people will come to your blog and read it. But getting traffic takes time. You have to wait and keep the patient.
If you want that people will come and read your blog then you have to learn these techniques to drive traffic.
There are two popular ways to drive free organic traffic on your website:
- Learn SEO:- You have to learn the basic things in SEO. No, You don’t have to be a professional. Basic knowledge is enough for SEO and Yoast SEO plugin will help you a lot.
- I know you are using social media like Facebook, Twitter, youtube for timepass with other people. So now you can use these social media platforms to promote your blog post and let other people know about your blog. Pinterest is the best option for driving traffic for new bloggers
If you want to know more about driving free traffic then you just read this post, where I have listed 20 unique ways to drive free traffic to your website. It is a detailed and step-by-step guide for free traffic generation.
Finally, the time has come to think about our earnings. Of course, if we do the hard work for creating content and help people then at the end of the day we need some monetary benefits from this blog.
10. Monetize your Blog
This is the end goal for every blogger. They do all the hard work to reach here and earn a good amount of money and be free from a 9 – 5 job. I know, it’s your dream too.
Let’s see how many ways you can monetize your Blog:-
Advertisement:- Advertising marketplaces like Google AdSense, Media.net, MediaVine, and more pay you money for showing ads on your blog. It is the easiest way to earn passive income from your blog. when you start a blog getting approved by any advertising company is your first goal.
Affiliate marketing:- This is the best way to earn a decent amount of income. Here you only suggest other people’s products to your audience and if they buy it you will receive a commission. You promote these products to buy writing reviews or by a dedicated page or a resource page on your blog.
Your Own Digital Product:- You can also sell your own digital product on your blog. Just create a tutorial or write an ebook and tell your readers about its benefits and if they like and buy you will get profit.
Sponsored Post:- Many companies offer bloggers to write about sponsored posts about any product or review. They pay a good amount of money for a single post.
There are also so many ways to earn from your blog. You can figure it out when you have experience in marketing and writing blogs.
Making money from your blog takes time. It can’t happen within the night. You have to put in your effort, do the hard work, and be dedicated to your blog. It usually takes 3 – 6 months of time to start earning. But if you learn the right approach then you can start earning earlier.
That’s all from my side in this detailed guide. I hope you understand each and every step very well.
It’s Time to Wrap up

So, what can you take from this How to Start a Blog Article?
You can start your Blogging career with this detailed guide. As a beginner, it might be an overwhelming process, but once you will learn all the techniques of blogging then you can turn this blogging into a money machine.
So be confident and give as much time as you can to learn to blog. Bookmark this page for later use because I will always update this post with new tactics and give you some important links for taking your blog to the next level because I am on a Journey to hunt Blogging and make it easy for all newbies.
Now a great Congratulations to you from my side because you have started your blogging career.
Thanks for staying with me till the end.